|
|


![]()

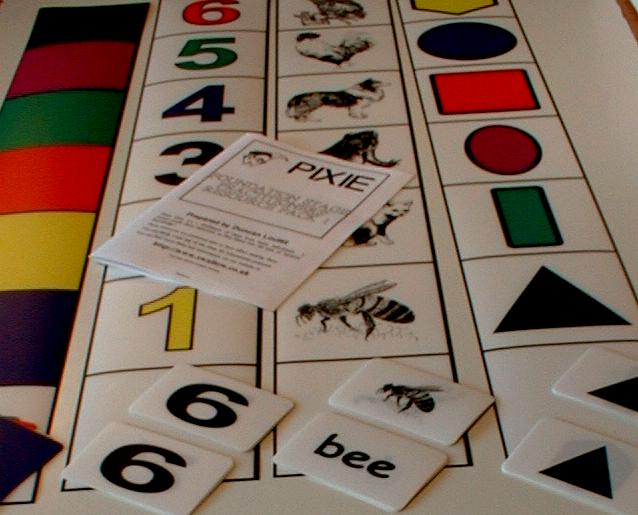
In the pack there are four strips for PIXIE to run on. These are colours, numbers, shapes and animal pictures. Each of the strips is divided up into seven PIXIE-sized squares. The first of these is blank and this is where PIXIE starts from. The printing on the PIXIE strips is on the back of the sheet so that PIXIE won't rub it off.
There are also 48 cards. There are 12 each of colours, numbers and shapes and 6 each of animal pictures and animal names.
The strips will fit into a PIXIE Playground. It is a good idea to use a Playground for the strips so that PIXIE cannot run off the edge of the table. It is better to use PIXIE on a table top rather than on the floor as the children are less likely to lean or tread on it.
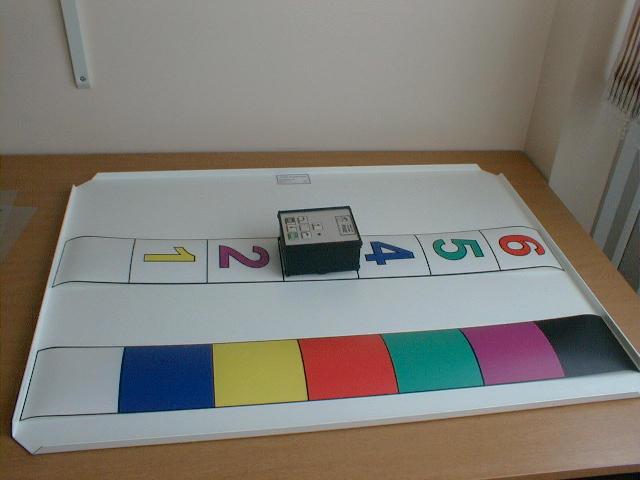
There are instructions here for making the Playground or you can buy one. You could make a narrower version of the Playground if you are short of space.
The general activity with all of the strips is to start with PIXIE on the blank start square, then the children draw one of the cards from a pile and program PIXIE to go to the matching element.
These are basically extracts from the information that comes with the pack to give you a feel for what you can do.
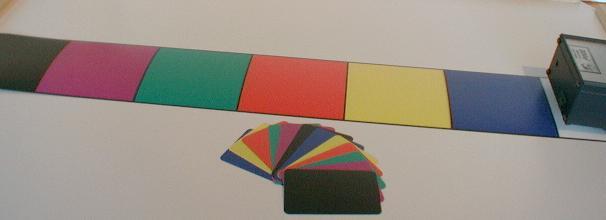
Colour Line
This is the simplest activity. The first time you use it, sort out the red, yellow and blue cards (two of each colour). Mix the cards and put them face down near the strip. Put PIXIE on the start box. Now explain to the children that they must take the top card, find the matching colour on the strip and program PIXIE to go to that square.
They will need to count (up to three) for how many forward steps PIXIE will need to get there and press forwards that number of times. You will probably need to demonstrate the activity a couple of times to show exactly what the children have to do. Don't forget CM!
After PIXIE reaches its destination and you have talked about the activity, you should pick PIXIE up and replace it on the start square. Don't push it along!
If a child makes an error, you should analyse the problem with them. Possible problems include miscounting the squares, miscounting the button presses, pressing the wrong buttons and not pressing CM. Watch that PIXIE flashes for each button press to be sure that the child has pressed the button properly.
If a boy has problems with the green and red colours, be aware that he may be colour blind.
After the children have worked with the first three colours for a while, you can add the rest of the colour cards and work up to 6.
For extension work you can get the child to program PIXIE to return to the start after it has reached the target colour.
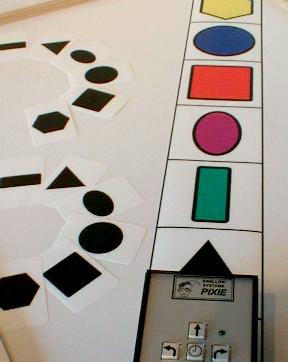
Shape line
This activity is essentially identical to the colours activity. Start off, as before, with just the triangle, rectangle and ellipse (you might want to call them triangle, box and oval). Add the other shapes to increase the range of counting.
You can then add the colour cards as well so that the child has to make PIXIE go to the corresponding shape or colour depending on the card taken. Initial extension work is the same as for colours but you can also use descriptions for the shapes. So, you might ask the children to go to a shape with 3 corners or with no corners.
If you have very bright children you could ask them to go to the shapes in order of the number of corners. There are 2 shapes with no corners and 2 with 4 corners, so there are several correct answers.
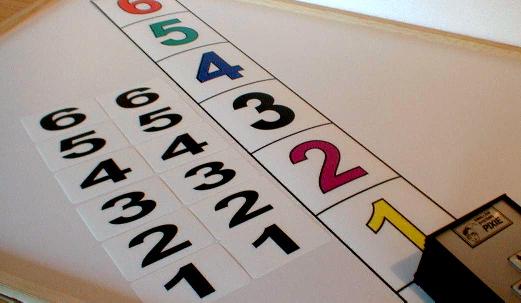
Number Line
This is the same as the shapes activities but you can use dice instead of the cards if you want to. Normal dice are good in that a child has to count the spots on the upper face and than count the same number into PIXIE. You can also get dice with numbers on their faces instead of the spots.
An interesting idea with the number strip is to start at different places. Program PIXIE to go forward 2, then starting at 1 takes you to 3, starting at 2 takes you to 4 etc. You can investigate "two more". You can also use backwards 2 to investigate "two less"
You could go the whole hog and use PIXIE as a calculator. If you want to add 2 and 3, start on the blank square (0), program PIXIE to go forward 2, when it has finished, program PIXIE to go forward 3 and note that it ends up on 5 (2+3). Of course, you could always count in the presses for forwards 2 and then again for forwards 3 so that PIXIE goes straight to 5.
For extra extension work, you could ask the child to make PIXIE pause for the same length of time as the number, and then return to the start box. This means that they have to count the number in 3 times, once for the forwards leg, once for the pause and once again for the return to the start box.
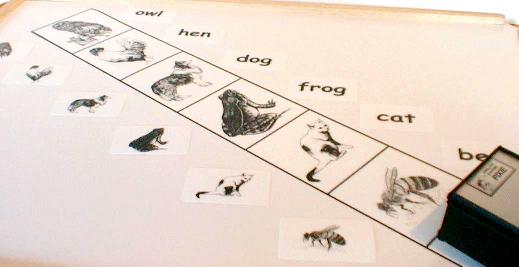
Animal Pictures
This is similar to the other activities, but now you can use words instead of, or as well as, the matching pictures. Again, you can start with just the bee, cat and frog and add the others later.
As the pictures are much more interesting than the other subjects there are many more opportunities for language development. You can ask the child to chose which animal to go to and tell you something about the animal when PIXIE gets there, or you could ask the child to go to the friendliest, the wettest, or the smallest.
The actual animal that the children use doesn't matter. The interesting thing is that the children can talk about, and justify, their choice. You might ask them to pick an animal and then ask them what is special about it and why they chose it.