Some suppliers give instructions with the motor/gearbox assembly, others don't; so there are full instructions here.
First cut or saw the drive shaft to 25 mm long. I used a heavy pair of pliers but it may be easier to use a junior hacksaw.
Take one of the pulleys (not part of the motor/gearbox unit) and put it, flat side down, on a piece of plastic (the wrapping from the gearbox unit is convenient). Put a drop of cyanoacrylate glue on the centre hole and push the shaft firmly and rapidly right through the hole. I used a pair of pliers to hold the shaft. It is easiest if you push the rounded and through instead of the cut end. Pull the pulley away from the plastic,wipe the excess glue off the pulley, and throw the plastic away.
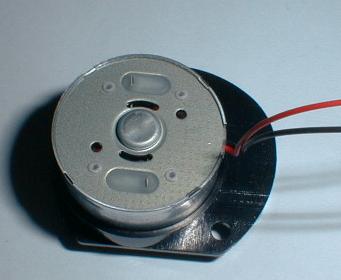
Remove the packing ring from the body of the motor. This is the plastic ring with the label stuck on it.
Clean up all the plastic gears. Remove any moulding flash so that the gears will rotate freely. Pay particular attention to the sides of the gears as the one that I had, had bumps on the sides of the gears that made them "click".
There are two types of gears. One has two sets of teeth, the other has just a single set and a plain ring. One of the single gears has a 2 mm hole in the centre. This is the one for the motor. Press the single gear onto the motor shaft with the plain ring towards the motor body. Leave the gear about 2 mm from the body of the motor.
There are two gearbox housing mouldings. One has a larger hole. This is the one that the motor fits into. Press the motor body into the housing with the leads facing at right angles to the flat side.
Fit two of the double gears onto the "prongs" sticking up from the casing that the motor is in. The smaller gear is upwards. Make sure that the gears are meshed properly. Ensure that the gears can rotate freely. If not, you have probably left some flash on one of the gears. In particular check for flash on the sides of the gears.
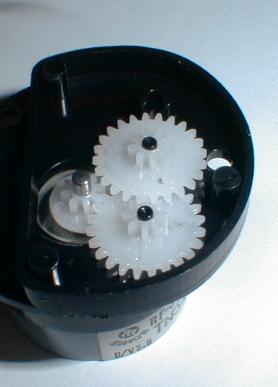
Slide the drive shaft through the other half of the casing. It goes through the smallest hole. Push one of the double gears onto the drive shaft with the small gear downwards. Don't press it down hard against the casing as the shaft must be free to turn. However, it should be close to the casing so that the shaft only moves back and forwards by half a millimetre or less.

Test assemble the two halves of the gearbox. I needed to use a pair of pliers to push the two halves together. Check that everything turns freely and the gearbox works. You could try applying a single 1.5V cell to the motor and check that all is well. Now pull the two halves apart again.
Put a drop of oil on each of the gears. Put 6 tiny drops of cyanoacrylate glue with even gaps round the edges of the motor gearbox half. Make sure that there is no excess glue and there is no glue on the gears. Press the two halves back together and put the assembly to one side for the glue to set.
Repeat this for the other side.
Once you are sure that the glue has set, you can fit the "O" ring tyres to the pulleys.